Wednesday, December 14, 2011

Chapatis

I love to make Indian food.  Chapatis are a traditional accompaniment to many Indian dishes, and are similar to tortillas.  While relatively simple in nature, they do take some time and effort to make.  When I don't have the time to make them, I buy a pack of wheat flour tortillas from the supermarket. But when I do have the time, the meal is so much better!

You will need:

2 c. wheat flour
warm water
1/2 tsp. salt
1 tsp garam masala (optional)
1/2 tsp chili powder (optional)

In a large bowl, blend flour and salt.  Blend in spices if you desire to use them.  Gradually add warm water, kneading it into the dough.  Add enough water until dough is slightly tacky but doesn't stick to your fingers.  Cover bowl with a dish towel and set aside for half an hour.


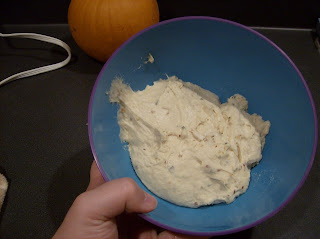
Yep.  Just stick your hands in a go to town.


Once dough as rested, lightly knead the dough.  Pinch off a bit of dough approximately one inch in diameter and roll into a ball.  On a lightly floured surface, roll the ball of dough out into a flat circle.  The circle should be as thin or thinner than a tortilla.


 Heat a large non-stick pan or skillet over medium heat.  Once hot, throw the dough circle on the pan.  Let the chapati cook for 1 1/2 to 2 minutes on each side.  The chapati may puff up in spots and that's ok.  Move chapati to a warm place, like the oven, to keep warm until the rest are done.  Spread with ghee (clarified butter) or melted butter to keep from going dry.  You can roll out chapatis as you cook them, but keep an eye on the one in the pan!

Giving it a flip.  Notice the puffed up parts.  Also, notice we had two pans going at once.

Olive giving the chapatis a little butter bath.  

These are best served warm and fresh.  While you can store leftovers in an air-tight container, they do toughen up quickly.  Re-heat in the microwave sprinkled with a few drops of water.  

Here is a recipe to an Indian dish to try these with.  

- The Pink One

Potato and Lentil Curry

A few years back when I was still in undergrad, I studied abroad for a year.  Wales is a beautiful country and full of wonderful people and places.  (Also, Doctor Who is filmed there.  Just FYI.)  While there I became good friends with my buddy VK, who was also an international student and hailed from Mumbai.  While VK's culinary  talents were restricted to boiling water and swishing rice and veggies around in a pan, his mother was more than willing to teach us how to make delicious Indian food.

Also, he's pretty good at being a pirate.  

Ruchi came to visit us for a month.  Well, she came to visit VK for a month, but we definitely appreciated the home-cooked meals we got by association.  Ruchi taught us how to make some of her (and VK's) favorite dishes.  While this dish is not one of the meals she taught me to make, many of the procedures are the same.  I'll be sure to share some of Ruchi's recipes next semester.  However, Ruchi did teach us how to make chapatis, which are excellent with this dish.  A link is included near the end.

Miss you, Ruchi!

I know some think that Indian food is difficult to make, but I hope to ease those concerns with this entry.  It is a delightful cuisine full of healthy vegetables and spices.  The hardest thing to cooking Indian in the States is finding some of the ingredients, particularly the spices.  It may be in your best interest, time and money-wise, to buy the harder-to-find spices online.

Potato and Lentil Curry

1 c. uncooked lentils (red or Dal works best)
2-3 potatoes, peeled and cubed 
1 onion, finely chopped
1 Tbs. minced garlic
2 Tbs. vegetable oil
3 large tomatoes, pureed 
2 Tbs curry powder
½ tsp turmeric powder
1 Tbs ground cumin
1 tsp chili powder
½ tsp salt
½ tsp sugar
½ tsp ginger powder

Rinse lentils (I used Dal) under cold water until clean; without a good rinse they get filmy or scummy.  Cook lentils in boiling water until soft to eat.  This can take 30-50 minutes based on type of lentil.  Drain water and set aside.

Water will run clear during rinsing when all the scummy-crap is gone.  

While the lentils are cooking, take your peeled and cubed potatoes (I used reds) and saute in a large pan with a tablespoon of vegetable oil on medium-high heat.  Season with salt, pepper, and cumin if desired.  Cook until approximately 75% done; it will finish cooking in the curry sauce.  Turn off heat and set aside.  

Just give it a stir every once in a while.

In a large pot, heat a tablespoon of vegetable oil on medium-high heat.  Cook onions and garlic until softened.  Add pureed tomatoes and spices and mix well.  You may need to add a few tablespoons of water.  Let cook on medium-high heat for 2-3 minutes then reduce to a simmer.  Taste-check sauce and add salt, sugar, or cumin to taste.  Let simmer for 10 minutes.  Stir in cooked lentils and potatoes.  Let simmer another 15 minutes and serve.

I like to put all the spices in a bowl so I can easily add them when its time.  Also, it looks pretty.


Simmering away, and almost ready.  

Serve with naan, chapati, or rice.  Here is a recipe for chapati.  Consider an Indian Pale Ale if you are of age; milk or mango juice will also be nice.


Share with friends.

- The Pink One

Sunday, November 20, 2011

Pumpkin Cookies

Thanksgiving is fast approaching, kids, which means a brief reprieve from our studies.  It also means time with the family or close friends.  Should you find yourself in charge of dessert, here is a fun, unique recipe I received from an adviser, Sarah, who taught me everything I know about ethics in psychology, program evaluation, and escaping the vice-like jaws of a biting children.

Not only are these cookies delicious, they are also highly ethical.

These cookies are soft and light and a perfect Thanksgiving weekend treat.  They make a large batch, so there will be plenty to go around and send home.

You will need:

1 1/2 cups unsalted butter, room temperature
1 3/4 cups sugar
3 eggs, room temperature
1 15 oz. can of pumpkin puree
3 teaspoons vanilla extract
4 3/4 cups all-purpose flour
2 teaspoons baking soda
1 teaspoon salt
2 teaspoons cinnamon
1 teaspoon ground nutmeg
1 teaspoon ground cloves
1/2 teaspoon ground ginger
12 oz. of chocolate chips (optional, but sooo good in these)

Cream butter and sugar in a large mixing bowl.  Stir in eggs, one at a time, until well combined.  Stir in pumpkin and vanilla.  Sift flour, baking soda, salt, and spices and gradually stir into the wet mixture.  Stir until ingredients are well combined.  Add chocolate chips, if desired.

Olive scooping out the cookies.

Perfect.

Scoop dough in tablespoon sized dollops on to greased cookie sheet.  Place into preheated oven at 350 F for 10-11 minutes.  Allow to cool.  Share with friends.

Yields approximately 10 dozen.

The Blonde One approves.


A Note from The Guv'nah:

While 10 minutes seems like a long time for cookies to bake, they need it.  Unlike other cookies, they won't harden up much as they cool.  We learned this the hard way when I insisted the first batch was done, removed them from the oven, and was rewarded with nothing but overly gooey cookies that rolled in on themselves when I tried to scrape them off the sheet.  (You win this time, Olive One.)

Happy baking and safe travels!

- The Pink One

Thursday, November 17, 2011

Spice Soup

Self-disclosure moment: I am a huge nerd.  Well, all of us at The Guv'nah are.  But I may have taken it to another level when I hunted down this recipe.  A few years back I was reading The Sword of Truth series by Terry Goodkind (basis for the TV series The Legend of the Seeker), and the characters were always eating a dish called spice soup.  It pops up often enough that I figured some fan somewhere came up with a recipe for it. And then I got lucky and found the recipe posted by Goodkind himself.  Apparently he got tired of rabid fans asking him for it.

Really?  You're asking for a soup recipe?  From this guy?

But it looked good so I gave it a try.  This is a great late fall/early winter recipe.  It's a hearty vegetable soup and great with whole-wheat bread.  It is super-filling and makes your whole house smell, as The Yellow One puts it, "Like awesome."

It is also a highly versatile dish and is inexpensive to make.  The recipe below is not the original (find it here) but one I've altered to my own tastes.  It's a great way to use up the odd vegetable that's been sitting at the back of the fridge.  You can make it so that it's just veggies in a thin broth by adding more water and only cooking the soup for the minimal two hours.  You can make it stew-like by letting it cook longer and adding minimal liquid as it evaporates.  However you make it, it is sure to become a winter-day staple in your house.

First, you will need to make the spice oil.  This will be used to saute some of the veggies.  I always make extra oil to add a little spice to other recipes with sauted veggies.

Spice Oil:
1/2 cup vegetable oil
4-6 crushed or diced dried red chili peppers
2 whole dried red chili pepper

There are several types of chili peppers to choose from, so pick one that suits your tastes.  Remember, the smaller the pepper, the hotter the taste.

In a small sauce pan, heat the vegetable oil on a medium heat.  Add all the peppers to the oil and simmer until the peppers are browned.  This will not take long; typically a few minutes.  Do not let the chilis burn.  Once browned, allow oil to cool slightly and strain out the chilis and seeds.  Set aside or store in an air-tight container.

Some of the peppers browned quicker than the others.  Should this happen, remove peppers before they blacken.


Soup:
2 tablespoons spice oil (recipe above)
1 medium onion (any kind you prefer or what looks good at the market that week)
3 cloves garlic, minced
1 small container of mushrooms (about a 1 ½ cups), quartered
3 carrots
4 stalks celery
5-6  small potatoes, peeled
2 cups chicken broth
¾ cup tomato or vegetable juice

Seasonings:
2 teaspoons Herbs de Provence (optional)
2 tablespoons Parsley
2 tablespoons Sage
Pinch of Salt and pepper
4-5 Bay leaves


All vegetables that are not already bite sized should be cut into large, bite-sized chucks.  In a large pot or stock pot, sauté the onion, garlic, and mushrooms in the spice oil for about 5 minutes.  Add the remaining veggies and liquids and bring to a simmer for about 10 minutes.  Add enough water to cover veggies with about an inch of water.  Add seasonings and stir well.  Let simmer on the stove top for at least two hours.  Occasionally add water as it evaporates, eventually bringing the soup to your preferred consistency (anywhere from thin to stew-like thick).  I typically allow the soup to simmer for 5 hours; the longer the better.  


Simmering into tasty goodness.

Ready to eat!  Perfect with some homemade honey wheat bread.

Optional ProTips:

As stated in the intro, this is a very versatile recipe. You can use what vegetables you like or what’s in season. I altered the original recipe to eliminate ingredients I didn’t like and incorporated more of the ones I do like.  This also included the seasonings; there are several options for making this soup tasty for you.  Really, I don’t think you can go wrong with this soup; its fool proof.

But here are some suggestions to consider.

Lemon juice: it will lighten up the flavor of the soup ever so slightly. Try adding 1/4 cup about an hour into the simmering process.

Dry white wine: a half cup of this added in the last half hour of simmering will give the soup a whole new twist.  Many homemade chicken soups and broths call for a small amount of white wine.

Low sodium chicken stock/broth: While the chicken broth contributes significantly to the soups flavor and adds protein, it is also very high in sodium (763 mg per cup).  Those looking after their heart health should trying using low sodium broth (450 mg per cup) if you can find it, or eliminating the broth from your recipe.  Never use bouillon as it has a much greater sodium content.  I routinely use low sodium with always tasty results.

Beef broth or low sodium beef broth: A nice twist for the beef lover.  This will change flavor quite a bit, so consider changing your seasoning to more beef-friendly varieties.  Beef broth has approximately the same amount of sodium as chicken broth, so consider using a reduced sodium type.

Enjoy the wintery weather!

- The Pink One


Friday, November 11, 2011

Banoffee Cupcakes

Here is a recipe I found a my new favorite food channel on YouTube.  Sorted specializes in quick and/or easy meals and treats, many of which can be made on a student's budget.  For more recipes or tips, check out their channel here.  Just keep in mind they use the metric system so temperatures are given in Celsius, measurements are typically given in weight instead of volume, and the UK tablespoon and teaspoon are different from the US version.

The appeal of this recipe was its nostalgia.  I spent a year abroad in the UK (South Wales to be precise.  Cymru!)  Banoffee pie is a British treat comprised of bananas and creamy toffee.  A bit sweet, a bit odd, but wholly delicious.  The gents at Sorted came up with this little number, which somehow combined banoffee pie and banana bread into a cupcake.  This is a wonderful and unique treat to make on a late fall afternoon!

Try not to lick the screen.

For the cupcakes you will need:

10 Tb melted butter
1 cup brown sugar, packed
3 eggs
2-3 overripe bananas, mashed
4 Tb plain or Greek yogurt
2 cups all-purpose flour
2 tsp ground cinnamon
1/2 tsp baking powder
1/2 tsp baking soda
cupcake tin/baking pan
cupcake liners

Preheat oven to 350 F.


Beat melted butter and brown sugar until fluffy.  Beat in eggs one at a time.  Stir in mashed bananas and yogurt.  Stir in flour, cinnamon, baking powder, and baking soda until combined.  Filled lined cupcake tins 2/3 full and place in oven for 20 minutes.  Remove and allow to cool completely.

You can just use a fork to slightly mash up the bananas.

Your batter will look something like this.

For the icing you will need:

7 Tb butter, unsalted
1 cup brown sugar, packed
8 Tb cream or milk
3 cups powdered sugar

Heat butter and brown sugar in a saucepan over medium heat until ingredients are melted and bubbling.  Remove from heat and immediately add cream, stirring constantly.  Stir for about one minute.  Stir in powered sugar.  Allow to cool until solid enough to frost with.

Mmmm.  Sugar and butter.


Frost cupcakes.  Yields approximately 2 dozen medium cupcakes.


- The Pink One

Saturday, October 29, 2011

Basic Biscotti

As graduate students, we really like our caffeinated beverages.  And by really like, I mean probably couldn't live without.  In fact, I no longer dilute my magical coffee with things like sugar or cream.  Much to The Sleepy One's amusement, I prefer my coffee 'straight up'.  And occasionally Irish.

But sometimes I like a little treat/sustenance with my tea or coffee.  Enter the biscotti.  Basically a crisp cookie that cafes will try to sell for $2 a pop.  Perfect for dunking, but not perfect for my pocketbook.  So here is a basic recipe for biscotti that you can flavor as you choose.  This batch I made with some homemade orange extract, the recipe for which you can find here.

To make the biscotti, you will need:

1/2 cup vegetable oil
1 cup sugar
3 eggs
1 tablespoon flavoring (vanilla, orange, almond, or anise extract)
3 cups all-purpose flour
1 tablespoon baking powder


Beat oil, sugar, eggs, and flavoring in a bowl until blended.  Slowly stir in flour and baking powder until a dough is formed.  Divide in half.  Form each half into roll or log and roll as long as your cookie sheet.  Place each roll on a greased or parchment covered cookie sheet. Press down the top of each roll until they are ½ inch think and flat on top.


Bake at 375 F for 25 minutes.  Remove from oven; allow to cool until cool enough to handle.  Remove from cookie sheet and cut each log, at an angle, into ½ inch slices.  


Place the slices  cut side down back on the baking sheet.  Bake for 5 minutes; flip the slices over and bake for another 5 minutes.  Remove from oven and allow to cool.


Store in an air-tight container.  Enjoy with a hot cup of coffee or tea during a study break.

- The Pink One

Homemade Orange Extract

Tailing on the last post, here is a brief recipe for orange extract.  Just like vanilla extract, orange extract can be quite expensive.  But it can be a wonderful flavor addition to many baked goods, especially those that include other fruit.  Or chocolate.

So with the holiday baking season fast approaching, I decided to get a batch started.  Plus we still have to kill off that bottle of nasty-ass vodka.

You will need:

1 cup vodka
1/4 cup hot water
The zest of 2 oranges
One glass, seal-able jar large enough to hold ingredients.

Wash and sterilize glass jar.  Let dry and set aside.

Wash the oranges well.  Zest the oranges, being sure to not scrape down into the white pith.


  Mix zest and hot water in the glass jar.  Let steep for at least 10 minutes.


Pour in vodka.  Seal with lid and give a good shake.  Extract will be ready for use in one week.

It will kind of look like Tang.  With pulp.  Mmmm.

- The Pink One

Saturday, October 15, 2011

Homemade Vanilla Extract

After The Yellow One made her fabulous vodka pie crust, we found ourselves in possession of a small bottle of vodka.  Now, this typically wouldn't be a problem for three graduate students such as ourselves, except that it was cheapest, grossest vodka we could find.  It has therefore spent the last month taking up space in our freezer.


Yeah.  Go Hawkeyes.

As you might imagine, Yellow and I go through a lot of baking supplies.  And probably the most expensive is vanilla extract.  You can get the cheap, imitation stuff for little more than a dollar.  But your baking suffers for your cheapness.  A decent quality vanilla extract will run you around $5-8 for a 4 oz. bottle.  

What?  Is the secret ingredient gold?

The vodka reminded me a trick I'd read about years ago.  Homemade vanilla extract using vodka and vanilla beans.  I couldn't make it at the time as I wasn't old enough to buy alcohol yet and just forgot about it.

After re-researching the product, I decided to give it go.  Many others seemed satisfied with their results and I look forward to never being without my precious elixir again.

To make the extract you will need:

1 cup vodka, bourbon, or rum
3 vanilla beans
An air-tight glass container large enough to hold both the liquor and beans.

Clean and sterilize the container.  Either run through a dish washer, or hand wash and fill with boiling water.  Allow to cool and dry.  Fill with liquor of choice.

Take the vanilla beans and slice down the middle.  If your container is tall enough, slice the bean leaving about an inch unsliced at the bottom.  If you used a smaller jar like I did, cut bean in half before slicing, again leaving a bit at the bottom unsliced.


Place the sliced vanilla beans in the jar.  Close jar.  Shake vigoursly.  Place in a dark space. 

Give the jar a shake about once every week.  Extract will be ready in two months.


Two months!? But I want it now!

Yep, two months.  But it was be so worth the wait.

Some cool things I've read about the upkeep of the extract.  You can pretty much keep it going by 'feeding' it like you would a sourdough starter (which is a post for another time).  When the jar gets down to about a quarter tank, top off with more liquor and replace one of the beans with a fresh one.

On choosing liquors, vodka, rum, and bourbon were the blog favorites.  Anything that is 80 proof (40% alcohol  works.  I used vodka as it makes plain, old fashioned extract and we had some on hand.  But the rum version would also add a nice flavor to many recipes like banana's foster, buttercream frosting, and anything with chocolate in it.

Lastly, look around for inexpensive vanilla beans.  This might mean looking online.  The cheapest bean that I could find in my city ran just under $3; the most expensive was $11.95.  For a bean.  I found good quality beans here.  They sometimes sell them even cheaper on Amazon.  I ended up only paying $0.65 a bean, though I had to buy a 10 pack.

We will keep you updated on the extract's progress. If all goes well, it should be done just in time for our Christmas Baking Extravaganza!

- The Pink One

Thursday, October 13, 2011

Chili Lime Chicken Pizza

The Yellow One had gone up to the Twin Cities for the weekend.  The Sleepy One and The Lollygagging One had gone back home.  And The Wandering One was, well, wandering.  What were The Olive One and I supposed to do?  Pizza, beer, and movie night.  Obviously.

We are such walking cliches.

So there we were.  Standing hungry and cold in our local grocery store, trying to figure out what the hell to make.  When we came across the sauce aisle.  Oh the sauce aisle!  Inspiration galore!  After a brief discussion on toppings, a fight over the pros and cons of various cheeses, and an awkward glare from a mother of four, we collected our ingredients and headed home.

The first thing we had to make was the pizza dough.  And by we, I mean me.  This recipe is for a thick, 14 inch wide pizza crust.  If you prefer a thinner, smaller crust halve the recipe.


To make the dough you will need:

1 package of active dry yeast (2 ½ tsp.)
1 c. lukewarm water (approx. 110 F)
2 c bread flour (all-purpose will due in a pinch)
2 Tb olive oil
1 tsp salt
2 tsp sugar
1 Tb oregano (optional)
1 Tb red pepper flakes (optional)

In a cup or small bowl mix the yeast and water.  It is important that the water be between 105-115 F for the yeast to activate.  Lower in temperature and there is little or no effect; higher and you kill the yeast.  Let mixture sit for 10 minutes.

In a medium bowl, combine flour, salt, sugar, and optional spices if desired.  Stir in water and oil until well combined.  The dough will be slightly sticky.  Let sit for 30 minutes; cover the bowl with a dish towel.


While the dough is resting, prepare your pizza toppings.  For pizza toppings you will need:

Good Housekeeping's Chili Lime Marinade or something like it
1 large chicken breast
1/2 green pepper
1/4 large yellow or red onion
2 roma tomatoes
1 clove garlic
lime juice
1 1/2 cups mozzarella cheese

Cut up chicken breast into small, bite-sized pieces.  Place in small, greased baking pan and pour enough marinade to cover the pieces.  Let marinate for at least 20 minutes; an hour is ideal.  Once marinated, place in a pre-heated 350 F oven for 10 minutes.  Remove from oven and allow to cool.

Try not to eat it all before putting it on the pizza.

Take the pepper, onion, and tomatoes and cut into small pieces.  Mince the garlic.  Sprinkle veggies with a little bit of lime juice.

Now to make our crust.  Remove dough from bowl and knead lightly.  On a large floured baking pan or stone, roll out the crust until its about 1/2 inch thick.  Place in pre-heated 350 F oven and bake for 7-9 minutes.  Remove from oven and allow to cool slightly.

Once slightly cooled, spread a very thin layer of marinade over the crust.  Sprinkle cheese over the crust and marinade.  Mozzarella works well, but try an Italian or pizza blend of cheeses.  Equally spread chicken, veggies, and garlic over the cheese.  At this point, it should look something like this:

Om nom nom nom....

Place back in the 350 F oven for 12-15 minutes or until desired brownness is achieved.  Serve with Parmesan cheese or with extra marinade on the side.  Wash down with a cold beer.  Enjoy with a good movie.

Suggested dessert:

Because everybody loves Alec Baldwin's Schweddy Balls.

 - The Pink One


Thursday, September 29, 2011

Sundays Are for Travel

At the start of this school year, one of my professors gave us a bit of advice.  Read, work hard, and keep Sundays for travel.  Taking her up on her advice, we began investigating some places to check out in the area.  With fall setting in we decided to hit up a local apple orchard before it got completely picked over.  Or so we thought.

The Olive One, The Yellow One, The Lollygagging One and I headed out one fine Sunday afternoon into the eastern Iowa countryside. After a ten minute drive north, the Garmin requested we turn right.  Onto Dingleberry Road.

This is why you don't let your 15 year-old son name anything. Ever.

Upon arrival we were greeted by a beautiful view of rolling hills filled with apple trees.  And the smell of apple cider donuts.  And screaming children.  After grabbing some apple baskets, we headed off to the area of the orchard we were told would be filled with delicious, juicy apples.  Not so much.  But at least it was away from the screaming children.  And looked like this.


So the actual picking of apples was kind of a bust.  But that didn't stop us from enjoying a fine fall afternoon.

In search of apples.

Olive fakes a photo op.

Pink pretends to pick a sour apple.

After giving up on finding edible apples we headed back to the farmhouse.  There we bought some pre-picked apples so we could at least make some apple-based treats.  We also picked up some apple butter, a caramel apple, and a bag of apple cider donuts.

I don't know how these made it to the morning.

So we took our goodies home and started making apple pie and apple crisp.  And by we I mostly mean Yellow.  She shared the secret to her easy pastry crust here.  But here are some photos of the process.

Stabby stabby! - Yellow

Slicey slicey!

She has too many apples in her pie, if you know what I mean.

Om nom nom nom.

Over all, a wonderful Sunday afternoon away from the books.  Plus, now The Guv'nah smells like Christmas!

- The Pink One